Quick checklist
Use this short list to decide whether the current photo is worth continuing with.
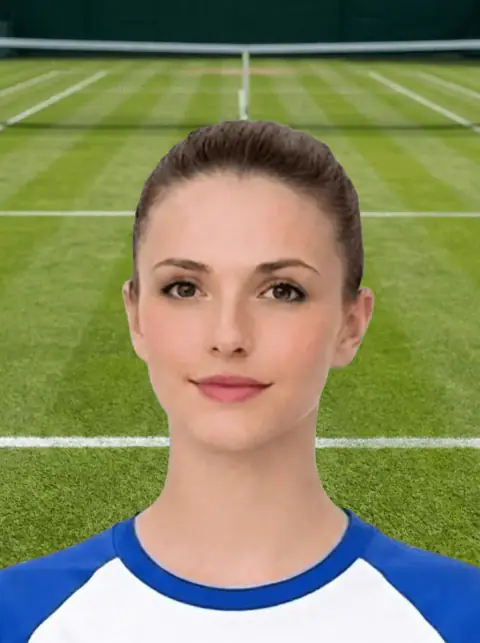
- Check whether both sides of the face look balanced and front-facing.
- Keep the camera at eye height instead of above or below the face.
- Avoid tilted head, raised chin, lowered chin, and side-facing poses.
- Use the face guide when expression, glasses, or hair also affects visibility.
Step by step
Follow this sequence to keep the workflow clear and reduce avoidable mistakes.
- 1
Place the camera at eye level
Place the camera at eye level.
- 2
Look straight into the lens
Look straight into the lens, not at the screen preview.
- 3
Keep shoulders level and avoid leaning forward
Keep shoulders level and avoid leaning forward.
- 4
Use the checker when the new photo is straight but crop is uncertain
Use the checker when the new photo is straight but crop is uncertain.
Common mistakes
These are the errors most likely to waste time or trigger a preventable rejection.
- Using a flattering portrait angle instead of a straight passport-photo angle.
- Taking the photo as a selfie from too high or too close.
- Letting the subject lean or turn slightly without noticing.
- Only checking the background and missing the face angle.
Face position rejection: centre, angle and eye line all matter
Face-position pages can rank for practical troubleshooting if they explain more than “look straight”.
- Retake if the face is turned too far to one side.
- Retake if the camera angle makes the head tilt up or down noticeably.
- Check the crop if the face is straight but not centred in the frame.
- Use the main requirements page for broader face visibility and expression guidance.
Source-photo setup for better face position
This connects rejection intent with a practical retake plan.
- Hold the camera level with the face rather than above or below.
- Leave room around both shoulders so the final crop can be centred.
- Take several photos and choose the one with the straightest face and clearest eyes.
- Avoid selfies taken too close to the face because they can distort position and shape.
Face-position rejection: straight head position comes before crop
This page should distinguish a turned head from a crop issue.
- A centred crop cannot fix a head that is turned too far.
- The face should look straight to camera with both sides visible.
- Tilted head position can make the eyes and chin line look uneven.
- Retake if the face angle is the main problem rather than the crop.
How to retake for better face position
This adds practical value for users after a rejection.
- Place the camera at eye level.
- Look straight into the lens, not at the screen preview.
- Keep shoulders level and avoid leaning forward.
- Use the checker when the new photo is straight but crop is uncertain.
How to capture a better face position
This gives practical next steps before checkout.
- Place the camera at face height.
- Look straight at the lens.
- Keep shoulders level and avoid leaning.
- Take several frames and choose the calmest, straightest one.
Face position rejection: centre and straightness matter
This page now gives a clearer answer for users whose photo failed because the head was turned, tilted or off-centre.
- Face the camera directly rather than turning the head.
- Keep both eyes level and clearly visible.
- Leave enough room for a balanced crop around the head and shoulders.
- Retake if the head is cut off or pushed to one side.
What can be fixed and what needs a retake
This prevents users from expecting crop changes to fix a bad source pose.
- Minor centring can sometimes be improved if the full head and shoulders are visible.
- A turned or tilted head usually needs a retake.
- A missing chin, hairline or shoulder cannot be recovered by resizing.
- Use the crop checker if the pose is straight but the framing is borderline.
Face position rejection: check head centre and camera angle
Face-position pages should answer both crop and pose problems.
- A face can be off-centre because of crop, camera angle, or source framing.
- Crop correction may help if the source photo has enough room.
- Retake if the head is turned, tilted, or cut off.
- Use the crop checker when the face is clear but not well positioned.
How to retake with better face position
Give users a practical recovery path.
- Face the camera directly.
- Keep the phone level with the face.
- Leave space above the hair and around shoulders.
- Take several photos and choose the straightest one.
Face-position rejection: turned, tilted, or off-centre
Face-position issues are usually source-photo issues and should be diagnosed before buying another output.
- Retake if the face is turned away from the camera.
- Retake if the head is tilted strongly.
- Check crop if the face is straight but off-centre.
- Check glasses, hair, and expression because they can combine with position problems.
When face position can be corrected
Do not overpromise rotation or recropping.
- Minor off-centre crop may be corrected if the full head is visible.
- Strong head turn cannot be fixed by cropping.
- Tilt may be fixable only if it is slight and the source has enough space.
- Retake if one ear, cheek, or eye is much more visible than the other.
Face position rejection: common causes
Face-position problems often overlap with crop, head size and expression.
- Head turned too far.
- Face too high or low in the frame.
- One side of the face closer to the camera.
- Source image taken from above or below.
Retake setup for face position
This gives users a clear next action after rejection.
- Hold the camera level with the face.
- Look straight at the camera.
- Keep shoulders square.
- Use the crop checker before final output.
Face position and identity checks
Face position matters because the image must show a clear front-facing view.
- Keep both sides of the face visible.
- Avoid looking up or down.
- Keep the head straight.
- Avoid angled selfies.
Can face position be fixed by cropping?
Cropping can help centring but cannot fix a turned head.
- Reframe if the face is straight but off-centre.
- Retake if the head is turned.
- Retake if one side of the face is hidden.
- Use crop checker before final output.
After a face-position rejection
Retake with a simpler setup before buying another output.
- Camera at eye level.
- Straight shoulders.
- Neutral expression.
- Plain background.
Face position checks before continuing
This page should help users identify when crop adjustment cannot fix the original pose.
- The face should look straight towards the camera.
- Avoid tilted shoulders or a leaning head that makes the face asymmetrical.
- Keep the head centred with enough background around it.
- Retake if the face is turned enough that one side is visibly smaller.
What to check before continuing
Use this checklist to decide whether the next step is a retake, a checker pass, or a different output route.
- Keep the face straight to camera and avoid tilted head position.
- Leave enough room above the hair and below the chin before upload.
- Avoid selfies taken from too high, too low, or too close.
- Use the crop or head-size checker before paying again.
Face-position rejection: fix, crop, or retake?
This page should help users decide whether face-position problems are recoverable or whether the source photo is too tightly cropped or angled.
- Search intent covered: face position, head placement, crop, and rejected photo framing queries.
- Retake if the chin, hair, or sides of the head are already cut off.
- Use crop/head-size guidance if the face is visible but poorly positioned.
- Check background and lighting separately from face position.
- Use the checker before paying for another output.
- This page should support the relevant conversion route without claiming official GOV.UK or HM Passport Office status.
Best next action from this search
Use the next step that matches the user intent instead of sending every visitor directly into the same flow.
- If the user has a source image, start with the free checker.
- If the user is still reading rules, continue to requirements, size, or rejection guidance.
- If the user needs output, choose digital file, photo code, or print-ready sheet based on the application wording.
- If the page is support-led, route to help, refund/remake review, or photo handling information before asking the user to pay again.
Face-position rejection page strengthened for crop and retake decisions
Face-position rejection searches need practical framing help and a next step: check, retake, or read size/head-position guidance.
- Search intent supported: face-position rejection troubleshooting.
- Explain centring, head room, eye direction and face visibility.
- Route head-size questions to the head size guide.
- Route severe crop problems to retake guidance.
- Route borderline source images to checker.
- This is public SEO/content thickening only; create, upload, checkout, payment, download, Modal and image-processing logic are unchanged.
Decision path for this query
The page should help the user choose the next safe action instead of pushing every visitor straight into the same paid route.
- Check a usable source image before paying.
- Retake when the source photo has obvious blur, shadows, poor background, tight crop or blocked facial features.
- Choose digital file, photo code or print-ready output only when that is the right application route.
- Use trust, support, privacy and refund pages when the user needs confidence before continuing.
Face-position rejection intent: move users to crop and retake decisions
Face-position pages convert better when they explain what can be corrected by framing and what needs a better source photo.
- Low-ranking query family targeted: passport photo face position, passport photo rejected face position, face not centred passport photo.
- Separate face-centre, eye-level and shoulder-position issues from background problems.
- Route crop/framing uncertainty to the checker and crop checker.
- Route severe source-photo angle or posture problems to retake guidance.
- Link to face guide and requirements hub for users still learning the rules.
- This is SEO content, trust clarification and internal-linking work only; create, upload, checkout, payment, download, Modal and photo-processing logic are unchanged.
Next step by user situation
The strengthened page now gives Google and users a clearer route from the query to the relevant action.
- If the user already has a source photo, send them to the free checker first.
- If the source photo has a clear defect, send them to retake or rejection-specific guidance.
- If the user is comparing providers, send them to local, booth, cost or provider-checklist pages.
- If the user is ready to prepare a UK passport photo online, send them to the main service route.
Route this user to the safest next action
The page now gives Google and users a clearer relationship between research intent, checker intent, and paid output intent.
- Use requirements and rejection pages when the user is still diagnosing the photo.
- Use the checker when the user has a source image and wants a preview before paying.
- Use digital, code, or print pages only after the output route is clear.
- Use trust and photo-handling pages when the user needs confidence before uploading.
What this page should prove
This added section helps search engines and users understand why the page exists and what the next safe action should be.
- Trust pages should prove service scope, support route, privacy, refund/remake and independent-service boundaries.
- Rejection pages should prove the visible problem, whether retake is safer, and which checker or guide page should be used next.
- No page should imply official affiliation, guaranteed acceptance, fake reviews or control over official application decisions.
Fix, retake or check
This decision block helps users avoid paying again for a source photo that is unlikely to work.
- Retake when the source photo has unclear face detail, blocked eyes, severe shadows, blur or missing head space.
- Use a checker when the source photo looks mostly usable but the crop, background or output route is uncertain.
- Choose digital file, photo code or print-ready output only after the visual problem is understood.
Face-position rejection signs
Face-position pages should help users distinguish crop problems from source-pose problems.
- The face is shifted left or right in the output.
- The head is tilted or turned away from the camera.
- The camera was held too high, low or at an angle.
- The crop leaves too little space above or below the head.
Retake or recrop decision
This gives users a practical recovery route before they pay again.
- Recrop may help if the source image has enough spare background.
- Retake if the head is turned, tilted or partly cut off.
- Retake with the camera level and directly in front.
- Use the crop checker before buying a replacement output.
Face-position rejection means alignment and visibility both matter
A face-position issue can be caused by head tilt, off-centre crop, looking away, or important facial detail being hidden.
- Retake if the head is turned, tilted heavily or not facing the camera.
- Re-crop only when the face is front-facing and complete but positioned poorly in the frame.
- Check that both eyes and the full face outline remain visible.
- Do not rotate or warp the face to simulate a straight capture.
Useful next routes
Passport photo searches often mix requirements, checker, digital upload, code, and privacy questions. These related routes help you choose the right next step without relying on a government affiliation claim.