Quick checklist
Use this short list to decide whether the current photo is worth continuing with.
- Use the rear camera where practical and keep the lens at eye height.
- Turn off filters, portrait effects, heavy editing, and screenshot workflows.
- Keep the face sharp and evenly lit with a plain background behind the subject.
- Export or upload the original file where possible so quality is not lost.
Step by step
Follow this sequence to keep the workflow clear and reduce avoidable mistakes.
- 1
Set up the room first
Prepare the background and lighting before you start shooting so the capture process stays short and consistent.
- 2
Frame the face cleanly
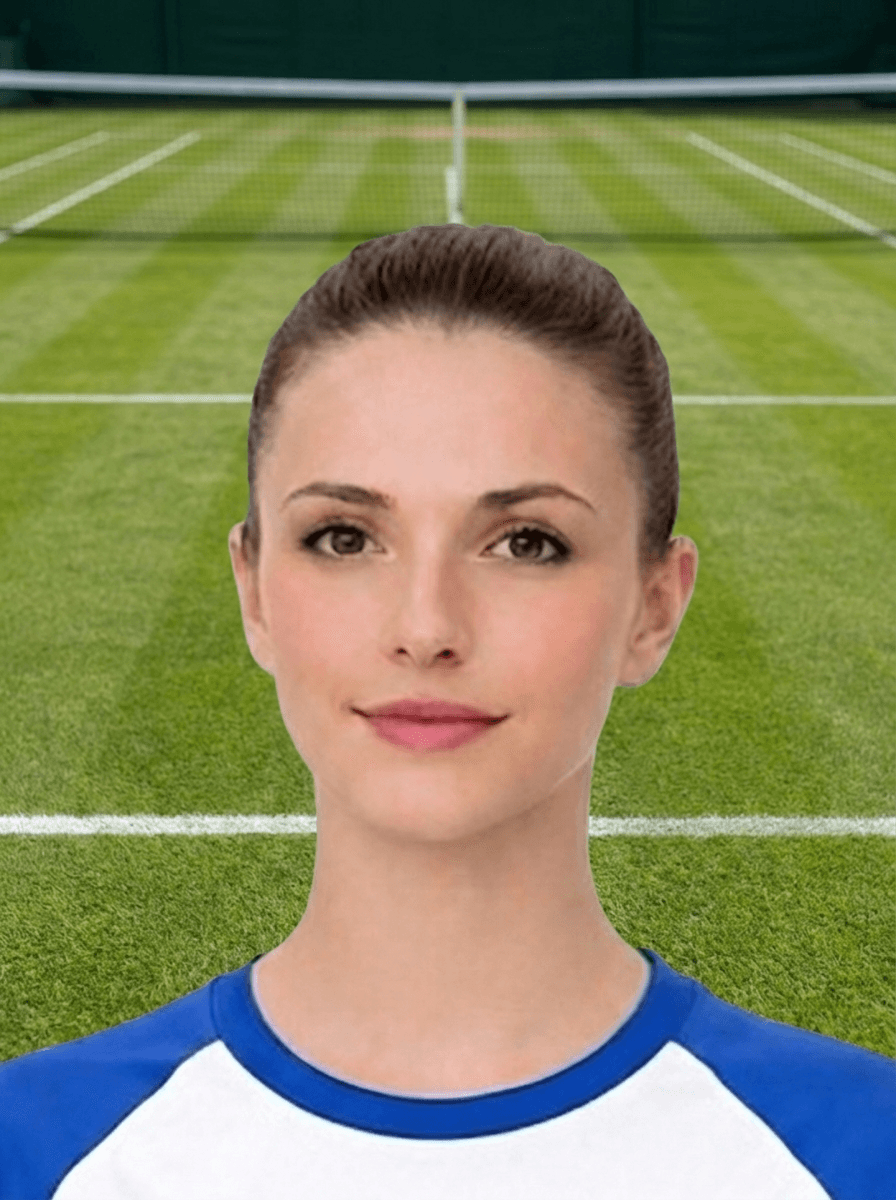
Keep the iPhone level with the face, use a natural expression, and avoid overly tight framing.
- 3
Capture several versions
Take multiple shots because tiny differences in blur, glare, or head position matter more than they seem on the phone screen.
- 4
Review before upload
Inspect the best frame at full size, avoid screenshots or compressed copies, and compare it against the requirements before you move into the preparation flow.
Common mistakes
These are the errors most likely to waste time or trigger a preventable rejection.
- Using portrait mode or beauty filters that change the face or background.
- Uploading a compressed copy from a messaging app instead of the original photo.
- Taking the photo too close, which leaves no crop room around the head.
- Letting ceiling lights or window glare create strong shadows on the face.
Why iPhone users still get rejected
The device is not the problem by itself. The setup usually is.
- Phone photos often fail because the room is dim, the camera angle is off, or the wall behind the subject is not plain enough.
- The preview on the device can make a soft image look stronger than it really is.
- Users also crop too early and lose the spare room needed for a clean final frame.
- This page should explain those mistakes without making the process sound complicated.
How to get a cleaner source image
The fastest win is usually to improve the capture conditions before editing anything.
- Use softer, broader light instead of a single bright lamp.
- Ask another person to take the photo if it helps keep the phone steady and level.
- Keep the background simple and leave visible space around the subject.
- Take several frames so you can choose the best one rather than trying to rescue the weakest shot.
- Avoid portrait-mode effects or heavy filters because they can make the photo look less like a formal ID image.
How to use the image afterward
Device pages should end with a clear next step.
- Compare the best iPhone photo against the requirements summary.
- Use the preparation flow to handle background and crop once the source image is strong enough.
- Move to rejection help if blur, glare, or shadow still stand out.
- Only continue to checkout once the photo matches the right digital or print route.
- Use the free checker before payment if blur, glare, shadow, or crop still feels uncertain.
How to upload the iPhone photo without weakening it
Keyword-gap data includes upload intent, so this device page should explain the handoff from Camera image to browser workflow.
- Use the original image from the Photos library rather than a screenshot, social-media save, or messaging-app copy.
- Avoid editing the file before upload unless you are only choosing the best original frame.
- If the image was shared from another phone, ask for the original full-resolution file rather than a compressed preview.
- Use the free checker after upload to screen crop, background, lighting, glare, and face visibility before payment.
iPhone settings that can weaken a passport photo
The strongest iPhone passport photo is usually a normal Camera image with minimal processing, not an edited social-media style image.
- Avoid portrait-mode background blur because passport photos need a natural, clear head and shoulder outline.
- Avoid beauty filters, heavy sharpening, or colour filters that make the face look unnatural.
- Avoid screenshots because they can reduce detail and change the crop before the passport-photo workflow sees the image.
- If Live Photo is enabled, choose the clearest still frame before upload rather than relying on a motion frame.
- Keep the original image file available until checkout and any support question are complete.
When the iPhone photo is ready to upload
This turns the device guide into a clear decision page instead of another thin how-to article.
- Move into the main UK passport photo route when the source photo is sharp, evenly lit, and framed with enough space around the head.
- Use the digital passport photo route if your application accepts a direct upload file.
- Use the photo-code route only if the application asks for a code handoff after the image is prepared.
- Read the photo handling page first if privacy or deletion requests are part of your buying decision.
- Use the free checker when the photo looks usable but you still want to screen crop, background, and face visibility before checkout.
Before using an iPhone image in the service
Device guides should not stop at camera setup; they should also show how to move safely into the upload flow.
- Upload the original Camera image rather than screenshots, social-media saves, or compressed messenger copies.
- Use the free checker before checkout if blur, glare, shadow, or crop still feels uncertain.
- Review photo handling and deletion guidance before uploading if privacy is the blocker.
- Use the digital, code, or print page only after the source image and output route are both clear.
Why this page is separate from the general home-photo guide
The iPhone page answers device-specific capture problems that the broader home guide cannot cover as directly.
- Stay here when the issue is iPhone camera setup, screenshots, compressed shared copies, portrait-mode effects, or small-screen review.
- Use the home-photo guide when the issue is room setup, wall choice, lighting, or how another person should take the photo.
- Use the checker only after you have selected the original Camera image that looks sharp and evenly lit at full size.
- Move to the digital, code, or print page only after the source image is usable and the application route is clear.
iPhone route decision after capture
The page should end with route clarity, not only camera advice.
- Use the digital route if the application accepts direct upload and the full-size image is clean.
- Use the code route only when the application explicitly asks for code handoff.
- Use print-ready only when paper output is genuinely required.
- Use the free checker first if route choice is clear but image quality still feels borderline.
Trust boundary for iPhone capture guidance
Device pages should stay clear about scope and limits before checkout.
- This page helps with capture quality and upload readiness for UK passport-photo preparation.
- It is not an official government decision or approval service.
- It does not guarantee acceptance when the source image remains weak.
- It links to quality review, privacy, and service standards before payment.
From iPhone capture to the correct output route
Device guidance should end with route clarity, not only camera tips.
- Use the checker when quality is close but still uncertain.
- Use digital upload when the application accepts a direct file.
- Use photo code only when the application asks for code handoff.
- Use print-ready only when paper-photo output is genuinely required.
iPhone capture choices that matter
This keeps the page distinct from the general at-home guide.
- Use the rear camera if another person can take the photo.
- Avoid portrait mode, beauty filters and strong background blur.
- Keep the lens clean and the phone at face height.
- Step back enough to include shoulders and space around the head.
iPhone settings and capture choices
This keeps the page distinct from the general at-home guide.
- Use the rear camera if another person can take the photo.
- Avoid portrait mode, beauty filters and strong background blur.
- Keep the lens clean and the phone at face height.
- Step back enough to include shoulders and space around the head.
iPhone problems that cause rejection risk
These are the issues users can fix before checkout.
- Face distortion from holding the phone too close.
- Glare from glasses or shiny skin caused by direct light.
- Uneven background from shadows or patterned walls.
- A head crop that is too tight because the image was taken too close.
Check before choosing digital, code or print
The capture device does not decide the final output route.
- Check the iPhone photo first if it looks close to usable.
- Use digital output for direct upload applications.
- Use code output only when your application asks for a code.
- Use print-ready output when you need paper photos.
iPhone passport photo: use the original camera file
iPhone-related searches often fail when users upload screenshots, edited copies, or messaging-app downloads.
- Use the original image from Photos where possible.
- Avoid screenshots, cropped previews, social-media saves, or heavily compressed message attachments.
- Keep lens distortion low by stepping back rather than taking an extreme close-up.
- Use the rear camera where practical and take several versions in steady light.
iPhone setup that improves the chance of a usable preview
This gives device-specific detail that can improve rankings for iPhone capture queries.
- Face a window or soft light source rather than standing under harsh overhead light.
- Stand away from the wall to reduce shadows behind the head.
- Keep the phone level with the face and avoid portrait-mode blur effects.
- Leave enough room around hair, chin, shoulders, and the top of the head.
When to retake instead of uploading the iPhone photo
This avoids routing weak images into the paid flow.
- Retake if portrait mode blurred hair or shoulders.
- Retake if flash glare appears on glasses or skin.
- Retake if the photo is too close to the face.
- Retake if the saved copy has been cropped, filtered, or compressed.
iPhone capture: avoid camera features that make passport photos risky
iPhone photos can be high quality, but some automatic features make passport-style preparation harder.
- Use the normal camera mode rather than portrait mode if portrait blur softens hair or shoulders.
- Avoid digital zoom; step back slightly and crop later through the preparation process.
- Use the rear camera where possible for sharper detail and less face distortion.
- Keep the original file rather than sending a screenshot or heavily compressed app export.
iPhone retake signs before using the checker
This gives users a clear decision before submitting a weak source image.
- Retake if the phone was too close and the face looks wide or distorted.
- Retake if the background is blurred around hair or shoulders.
- Retake if Smart HDR creates harsh highlights on the forehead, cheeks or glasses.
- Use the checker if the photo is sharp but crop or background suitability is uncertain.
What to upload from an iPhone
This addresses file-quality issues that can affect preparation.
- Upload the original image where possible.
- Avoid screenshots, messaging-app downloads and heavily cropped versions.
- If you edited the image, keep the unedited version available in case a retake or re-export is needed.
- Do not manually remove the background before checking the photo.
iPhone passport photo: use the camera well, not portrait effects
iPhone queries often attract users who can convert if the page prevents common camera-mode mistakes.
- Use the normal camera mode rather than portrait blur or beauty filters.
- Hold the phone level with the face, not above or below.
- Avoid wide-angle distortion by not standing too close.
- Keep the original file rather than a screenshot from the Photos app.
iPhone photo quality checks before upload
This turns device-specific traffic into a practical source-photo checklist.
- Zoom in and check the eyes are sharp.
- Make sure no automatic crop cuts off hair, chin or shoulders.
- Avoid mixed lighting from windows and ceiling bulbs.
- Check the background is plain enough before uploading.
iPhone capture checks before upload
iPhone queries often perform better when the page warns against compressed files and screenshot workflows.
- Use the original camera file when possible.
- Avoid screenshots, social-media exports, and messaging-app copies.
- Turn the phone straight rather than using an angled selfie pose.
- Check the full-size image before uploading so blur and over-cropping are visible.
iPhone photo issues that usually need a retake
This adds practical depth for low-ranking iPhone passport photo impressions.
- Face softened by portrait mode or low-light processing.
- Hair or shoulders cut off by a close selfie crop.
- Strong shadows from indoor lighting.
- Glasses glare or reflections from the screen or window.
iPhone setup for fewer rejection risks
This adds practical depth for device-specific low-ranking impressions.
- Stand near soft window light, not under harsh overhead light.
- Keep the phone level with the face.
- Leave enough space above hair and around shoulders.
- Take several photos and choose the sharpest, straightest one.
When to retake the iPhone photo
Help users avoid paying for source images that cannot be rescued.
- The face looks softened, blurred, or filtered.
- The photo is too close and cuts off hair or shoulders.
- Glare from glasses covers the eyes.
- Background or shadow makes the face outline unclear.
iPhone issues that affect ranking and conversion
Device pages should answer practical blockers that make users hesitate before upload.
- Camera angle: keep the phone level with the face instead of pointing up or down.
- Lighting: use soft even light and avoid wall shadows behind the head.
- File quality: upload the original Camera image rather than a screenshot or messenger copy.
- Route choice: choose digital, code, or print only after the source image passes the checker.
iPhone settings that reduce rejection risk
Most iPhone passport photo problems come from capture settings and lighting, not from the phone model.
- Use the standard camera rather than a beauty or filter app.
- Avoid Portrait mode blur around hair and shoulders.
- Turn off strong flash if it creates glasses glare or harsh shadows.
- Save the original photo rather than sending a compressed screenshot.
Check the iPhone image before upload
Zoom in before uploading so obvious issues are not carried into the prepared file.
- Eyes should be sharp and fully visible.
- Hair should not cut off the top of the head.
- There should be visible shoulders and space around the head.
- The background should not merge into hair or clothing edges.
iPhone photo to final UK output
The phone is only the source-photo step. The final route depends on the passport application.
- Use the checker if the photo may be borderline.
- Choose digital upload if your application accepts a file.
- Choose photo code only when that route is requested.
- Choose print-ready sheet for paper-photo routes.
iPhone mistakes that create rejection risk
Users searching this query are usually trying to avoid a failed DIY photo.
- Portrait mode can blur hair or shoulders and make edge cleanup harder.
- Wide-angle distortion can make the face look unnatural if the phone is too close.
- Screenshots and compressed messaging-app images may lose too much detail.
- Indoor yellow light can create colour casts that are difficult to fix.
After taking the iPhone photo
Create a clear conversion bridge while keeping the page informational.
- Choose the sharpest original image from the Photos app.
- Use the checker if crop, background, or head size looks uncertain.
- Use the digital page if your route asks for an upload file.
- Retake before paying if the face or hair is cut off.
iPhone settings and habits to avoid
Device-specific pages should answer practical capture questions instead of duplicating generic passport rules.
- Avoid Portrait mode blur, beauty filters and strong auto-warmth when possible.
- Use a normal camera view rather than ultra-wide close-up framing.
- Keep the phone level with the face to reduce distortion.
- Take multiple frames and choose the sharpest neutral one.
Before using the photo online
This provides a clear bridge from device capture to the checker.
- Check the face is front-facing and evenly lit.
- Check there is no shadow across the background or face.
- Check there is enough room to crop above the hair and around shoulders.
- Use the preview before paying for final output.
What to check before continuing
Use this checklist to decide whether the next step is a retake, a checker pass, or a different output route.
- Use the rear camera where possible and avoid portrait mode or beauty filters.
- Hold the phone level with the face and leave enough space above the hair and below the shoulders.
- Use soft daylight from the front or side rather than direct sunlight.
- Check glare, background shadows, face position and headroom before continuing.
Decision checklist before the next step
Use this checklist to decide whether the user needs a retake, a checker pass, or a different output route.
- Use the normal rear camera rather than portrait mode where possible.
- Avoid close selfies because they distort face scale and head position.
- Lock focus on the face and retake if the eyes or hair edge look soft.
- Leave extra headroom because the final crop needs space above the hair.
iPhone capture intent: prevent weak source photos
Phone-capture searches should reduce failed uploads by helping users avoid zoomed, shadowed, compressed, or over-cropped source photos.
- Search intent covered: how to take a passport photo with iPhone and iPhone passport photo steps.
- Tell users not to use screenshots or over-filtered images.
- Route blur, shadows, and background issues into rejection/support pages.
- Route Android users to Android-specific guidance.
- Route ready photos to checker before checkout.
- This page should resolve the specific support question first, then route to checker or output selection only when the source photo is plausible.
Best next action from this search
Users should be able to move from the search query to the correct next step without landing on a dead-end or choosing the wrong output.
- If the user has a source image, send them to the free checker before a paid output.
- If the user needs rules, send them to the requirements, size, background, face or rejection page that owns that subtopic.
- If the user knows the required output, send them to digital file, photo code or print-ready guidance.
- If the user needs trust information, send them to independent service, photo handling, refund/remake or support pages.
Indexation quality route
The page now makes its job clearer: answer one practical problem, link to the right supporting page, then route only usable photos towards the checker or correct output page.
- Use requirements pages for broad rules.
- Use troubleshooting pages after a visible problem or rejection.
- Use capture guides before retaking a photo.
- Use the checker when the source image looks strong enough to evaluate.
iPhone guide strengthened for mobile capture and checker handoff
iPhone passport photo searches are practical and close to action. The page now connects capture tips to checker, upload and route choice.
- Search intent supported: iPhone capture tutorial and mobile source-photo quality.
- Use rear camera, even light and enough distance to avoid face distortion.
- Avoid portrait filters, heavy shadows and tight head crops.
- Check the result before choosing digital, code or print-ready output.
- Route baby, glasses and hair issues to specialist pages when relevant.
- This is public SEO/content thickening only; create, upload, checkout, payment, download, Modal and image-processing logic are unchanged.
Best next step from this search
Low-ranking impression pages should not leave users in a dead end. Each page now routes the user to the closest useful next decision.
- Use the checker when the user already has a source photo and wants a pre-payment screen.
- Use the requirements and size pages when the user is still checking rules.
- Use digital, code or print pages only when that output route matches the application.
- Use trust, handling, refund and support pages when the user needs confidence before checkout.
iPhone capture intent: connect phone setup to checker and final output
iPhone users need practical capture guidance first, then a clear route to checking and preparing the final output.
- Low-ranking query family targeted: how to take a passport photo with iphone, iphone passport photo uk, take passport photo on iphone.
- Explain lighting, camera distance, no selfie distortion, plain background and eye-level framing.
- Route users to the checker once they have a source photo rather than asking them to pay immediately.
- Route output-route decisions to digital, code and print pages.
- Link to photo handling so mobile users understand what happens to uploaded images.
- This is SEO content, trust clarification and internal-linking work only; create, upload, checkout, payment, download, Modal and photo-processing logic are unchanged.
Next step by user situation
The strengthened page now gives Google and users a clearer route from the query to the relevant action.
- If the user already has a source photo, send them to the free checker first.
- If the source photo has a clear defect, send them to retake or rejection-specific guidance.
- If the user is comparing providers, send them to local, booth, cost or provider-checklist pages.
- If the user is ready to prepare a UK passport photo online, send them to the main service route.
Search intent and conversion bridge
The page now more clearly connects the user search intent to the next safest action.
- Use checker pages when the user has a current source image.
- Use requirements or rejection pages when the user is still diagnosing photo risk.
- Use output pages before choosing digital file, photo code or print-ready sheet.
- Use trust and policy pages when the user needs confidence before upload or payment.
Best next step for this search intent
The page should move users to the most useful next action without creating duplicate SEO targets.
- If the question is about rules, use the requirements and size pages.
- If the user already has a source image, use the free checker before payment.
- If the question is about output, choose between digital upload file, photo code and print-ready sheet.
iPhone passport photos work best from the original camera image
This page should help users capture a usable source image, not just tell them an iPhone can be used.
- Use the rear camera where possible and keep the lens clean.
- Avoid portrait-mode blur around hair and shoulders.
- Keep the phone level with the face and leave space around the head.
- Upload the original image rather than a screenshot or messaging-app copy.
Useful next routes
Passport photo searches often mix requirements, checker, digital upload, code, and privacy questions. These related routes help you choose the right next step without relying on a government affiliation claim.
FAQ
Can I use an iPhone for a passport photo?
Yes, as long as the image is clear, well lit, and framed correctly before you upload it.
What is the biggest iPhone mistake?
The biggest mistake is trusting the small phone preview instead of checking blur, glare, and crop at full size.
Should I use selfie mode?
A steadier setup with the camera level to the face is usually safer than a rushed selfie taken too close to the wall.
What should I do after taking the photo?
Choose the best frame, compare it against the main rules, and then move into the preparation flow only if the source image looks strong enough.
Do I need to download a passport photo app on iPhone?
No. You can use a browser-based passport photo app workflow on iPhone, upload the image from the camera roll, and check the preview before choosing a final output.
Should I upload a screenshot from my iPhone?
No. Upload the original Camera image from Photos where possible. Screenshots and shared copies can reduce detail and make blur or compression problems harder to fix.
Should I use iPhone portrait mode for a passport photo?
No. Portrait mode can blur the outline around hair, ears, and shoulders. A normal Camera photo with even light and a plain background is safer.
Can I edit the iPhone photo before uploading?
Avoid heavy edits, filters, beauty effects, and screenshots. Choose the clearest original frame first, then use the passport-photo workflow to check crop and background.
What if my iPhone photo still looks uncertain?
Retake with better light and wall distance first. If it looks close, run the free checker before paying for a final output.
Should I pay before checking my iPhone photo quality?
No. If quality confidence is low, use the checker first and retake if needed before choosing any paid output route.
Can I use an iPhone selfie for a UK passport photo?
A selfie is harder to control because of distortion and angle. A photo taken by someone else with the rear camera is usually a better starting point.
Should I use portrait mode?
No. Avoid portrait mode and filters because passport photos should look natural and should not have artificial background blur or face changes.
Should I use portrait mode for a passport photo?
No. Avoid portrait mode and filters because passport photos should look natural and should not have artificial background blur or face changes.
Should I use Portrait mode for an iPhone passport photo?
Avoid portrait-mode blur effects because they can soften hair, shoulders, or background edges. Use a clear normal camera photo instead.
Can I upload an iPhone screenshot?
Use the original camera file where possible. Screenshots are often lower quality and may already be cropped or compressed.
Can an iPhone photo be used for an online passport photo?
Yes, if the source image is sharp, evenly lit and leaves enough space around the head for final framing.
Can I use an iPhone photo for a UK passport photo?
Yes, if the original file is sharp, recent, evenly lit, and leaves enough room for a passport-style crop.
Should I use iPhone portrait mode?
Avoid portrait blur or effects because passport-style photos need natural facial detail and a clear head outline.
Can I use an iPhone selfie?
A rear-camera photo taken by someone else is usually safer because selfies can distort face position and crop.
What should I do after taking the iPhone photo?
Upload the original image, check the preview, then continue only if the prepared result looks suitable.
Should I use portrait mode for a passport photo on iPhone?
Usually no. Portrait mode can blur hair or shoulder edges, which may make the photo harder to prepare cleanly.
Can I use an iPhone selfie for a passport photo?
A rear-camera photo taken by someone else is usually safer because it reduces distortion and improves detail.
What iPhone file should I upload?
Upload the original sharp photo from the Photos app, not a screenshot or a compressed copy from a messaging app.
Can an iPhone photo work for a UK passport photo?
Yes, if the image is sharp, evenly lit, unfiltered and framed correctly. The phone is only the capture device; the final image still needs to meet the relevant photo requirements.
Why avoid iPhone portrait mode for passport photos?
Portrait mode can blur hair edges and change the background in a way that makes passport-photo checks less reliable. A normal rear-camera photo is usually safer.
Why does an iPhone passport photo sometimes look too close?
Phone photos are often taken at arm length or with a wide-angle lens. That can make the face look larger and leave too little space for the final crop.
Is an iPhone good enough for a passport photo?
Yes, if the photo is sharp, evenly lit, straight-on and not affected by filters or portrait blur.
Should I use the front camera or rear camera?
The rear camera is usually better if someone else can take the photo, because it often gives sharper results.
Can I use a phone photo for a digital passport photo?
Often yes, but not every phone photo is suitable. The image still needs clear face detail, even lighting, a plain background and enough room for cropping.
Can I use an iPhone for a UK passport photo?
Yes, if the image is sharp, evenly lit, natural-looking and has enough room around the head.
Prepare your photo before you submit it
Use the upload flow when you already have a source image, or keep exploring the guides if you still need to fix the setup first.