Rejection reason

Passport Photo Rejected for Head Size

Head size problems usually come from framing, crop space, or camera distance rather than from the face itself. This page helps users decide whether the current image still has enough room to recrop cleanly or whether the whole capture needs replacing before another submission.

Direct answer

If your passport photo was rejected for head size, the head may look too large, too small, too high, too low or too tightly cropped. Retake if the source image lacks enough room.

Crop-related pages convert well because the problem looks specific and often feels solvable.

Updated 11 July 2026Reviewed by Passport-Photo.co.uk editorial teamContent review
  • Explains head-size and crop mistakes
  • Shows how framing changes the result
  • Helps users decide whether the photo is still salvageable
  • Links to face position and print-related guidance
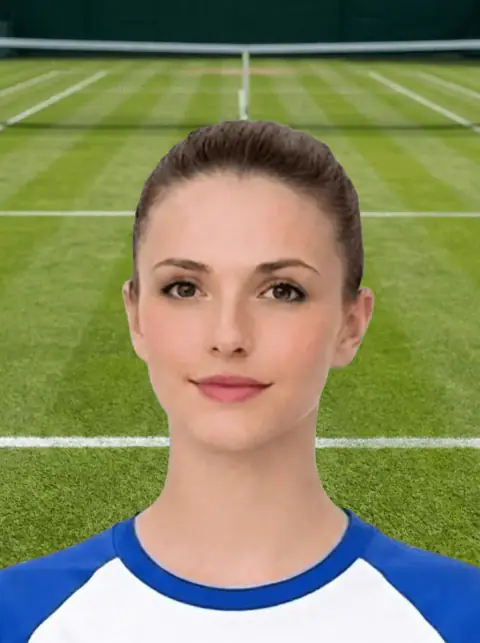
Passport photo example with poor crop and head size framing
Head-size problems are usually about crop discipline, not about the subject's face.
Next step

If the photo looks usable, check it before you pay

Use the free preview to screen the current image, then choose the final UK passport photo route only when the source photo is worth keeping.

Quick checklist

Use this short list to decide whether the current photo is worth continuing with.

  • Check whether the head looks too close to the top, bottom, or sides.
  • Make sure the hairline and chin are both visible with natural space around them.
  • Retake if the original is cropped too tightly to rebalance.
  • Use the head-size checker when the image looks close but uncertain.

Step by step

Follow this sequence to keep the workflow clear and reduce avoidable mistakes.

  1. 1

    Step back enough to include head and shoulders

    Step back enough to include head and shoulders.

  2. 2

    Keep the camera level with the face

    Keep the camera level with the face.

  3. 3

    Leave space above the hair and below the shoulders

    Leave space above the hair and below the shoulders.

  4. 4

    Avoid close selfies and wide-angle distortion

    Avoid close selfies and wide-angle distortion.

Common mistakes

These are the errors most likely to waste time or trigger a preventable rejection.

  • Cropping manually before upload.
  • Taking a selfie too close to the face.
  • Ignoring shoulders and top space while focusing only on the face.
  • Trying to resize a photo that has already lost hairline or chin space.

Head size rejection: check ratio and vertical balance together

Head-size pages should avoid reducing the issue to one number. Visual balance and crop space also matter.

  • The head can be the right approximate size but still look too high, low, or off-centre.
  • Retake if the source photo cuts off hair, chin, or shoulders before processing.
  • Use the crop checker if the head size looks close but the vertical position is uncertain.
  • Do not zoom into a weak source photo so much that shoulders and top margin disappear.

When head size can be corrected and when it cannot

This helps users decide whether to continue to the checker or retake first.

  • It may be correctable if the source photo has enough room above the head and below the shoulders.
  • It is usually a retake case if the top of the head or chin is already cut off.
  • It is risky if the face is very close to the camera and distorted.
  • A balanced source photo gives the preview and final output more room to work.

Head-size rejection: a correct file size can still fail visually

This page should explain why dimensions and visible head position are separate.

  • A photo can have the right canvas size while the head is too large or too high.
  • Visible head size should include hair or head outline down to the chin.
  • A very close selfie may not leave enough room to correct the crop.
  • Shoulders and space above the head help create a more balanced final photo.

When head-size problems need a retake

This helps users avoid repeatedly submitting a source photo that cannot be fixed.

  • Retake if the top of the hair or chin is cut off.
  • Retake if only the face is visible and no shoulder context remains.
  • Retake if the head is far to one side in the original image.
  • Use the checker if the source photo has enough surrounding space but the final crop is uncertain.

Head-size rejection: too close, too small or off-centre

Head-size pages should explain visible framing, not just numeric dimensions.

  • Too close can cut off hair, chin or shoulders.
  • Too small can make the face hard to assess.
  • Too high or too low can make the crop look unbalanced.
  • Retake if the source image lacks enough room to reframe.

When head size can be corrected

This helps users decide whether the current photo is worth checking.

  • Correction is more likely when the full head and shoulders are visible.
  • Correction is unlikely if the hairline or chin is missing.
  • A straight face is easier to reframe than a turned or tilted face.
  • Use the head-size checker before choosing a paid output.

Head size rejection: size, crop, and source room matter

This page should connect rejection diagnostics to the size guide and checker.

  • A head can be too large if the original photo was taken too close.
  • A head can be too small if the person is too far away or crop is wrong.
  • Online crop correction needs enough source space around hair and shoulders.
  • Retake if the source image cuts off hair, chin, or shoulders.

Before trying to fix head size

Make the next action clearer.

  • Check whether full head and shoulders exist in the source image.
  • Check whether face and eyes are sharp.
  • Use the size guide for dimensions and visible framing.
  • Use the crop checker if the head position looks high, low, or off-centre.

Head-size rejection: too close, too far, or badly centred

Head-size rejection pages should explain visible framing, not only measurements.

  • Too close usually means hair, chin, or shoulders are missing or crowded.
  • Too far away can make facial detail too small or unclear.
  • Off-centre crops can make the photo look unbalanced even if dimensions are correct.
  • A retake is needed when the source image lacks enough space around the head.

How to retake for better head size

Give a practical route for users who cannot fix the current photo.

  • Step back enough to include head and shoulders.
  • Keep the camera level with the face.
  • Leave space above the hair and below the shoulders.
  • Avoid close selfies and wide-angle distortion.

When crop correction can help

Clarify when the user can still use online preparation.

  • The full head and shoulders are visible.
  • The source image is sharp and not compressed.
  • The face is straight and centred enough.
  • There is background space around the subject to crop from.

Head size rejection: source photo or crop issue?

Some head-size issues can be reframed; others need a new source image.

  • Reframe if the full head and shoulders are still visible.
  • Retake if the hair or chin is cut off.
  • Retake if the face is too small and low detail.
  • Avoid zoomed-in selfies and pre-cropped images.

Better retake for head size

Users need clear camera-distance guidance.

  • Step back slightly.
  • Keep shoulders visible.
  • Hold the camera level.
  • Do not crop before upload.

Head too large or too small

The fix depends on whether the source image still has enough usable space.

  • Too large often means the camera was too close.
  • Too small often means detail is weak.
  • Cut-off hair or chin usually needs a retake.
  • Shoulders help maintain natural crop balance.

Check crop before paying again

Head-size rejection should lead to a crop decision before final output.

  • Use the head size checker.
  • Use the crop checker.
  • Retake if there is not enough space.
  • Avoid pre-cropped social media images.

Route after fixing head size

Only choose output once the framing looks usable.

  • Digital file for upload.
  • Photo code for code route.
  • Print-ready sheet for paper photos.
  • Requirements page for broader rule checks.

Head size is more than the outer photo dimensions

This strengthens size/framing relevance and prevents users from assuming canvas dimensions are enough.

  • The crown-to-chin area must look balanced in the final image.
  • A tight selfie may not have enough room to resize the head safely.
  • Too much body space can make the head look too small.
  • A crop that is high, low or off-centre can fail even when the file dimensions look correct.

When head-size problems can be corrected

This helps users decide whether to continue or retake before checkout.

  • Correctable: the original photo has spare room around the head and shoulders.
  • Risky: the hair, chin or shoulder line is already cut off.
  • Risky: the face is angled or the camera was very close.
  • Use the checker before payment if the source image looks close.

Head-size rejection page strengthened for crop recovery

Head-size rejection searches need a practical crop and retake decision, not only a rule statement.

  • Search intent supported: head size rejection troubleshooting.
  • Explain how too-large or too-small head size can happen from capture or crop.
  • Route users to head-size checker and guide pages.
  • Route severe tight crops to retake guidance.
  • Route borderline images to checker before checkout.
  • This is public SEO/content thickening only; create, upload, checkout, payment, download, Modal and image-processing logic are unchanged.

Route this search to the right next step

These long-tail pages should clarify wording, provider, route or output intent before asking the user to continue.

  • Use picture-wording pages to support the same photo-preparation entity without creating duplicate intent.
  • Use provider and alternative pages for comparison, not unsupported competitor claims.
  • Use where-to-get pages to compare online, booth, shop, digital, code and print routes.
  • Use checker, requirements and trust pages before checkout when source quality or confidence is the blocker.

Head-size rejection intent: connect head size, crop and checker paths

Head-size rejection searches should route users to crop/framing help instead of generic requirements copy.

  • Low-ranking query family targeted: passport photo rejected head size, passport photo head too big, passport photo head size.
  • Explain that head size is linked to crop, face position, shoulders and available top space.
  • Route users to the head-size checker and size guide before they start again.
  • Route repeated rejections to the rejection hub and service standards page.
  • Avoid making the page compete with the main requirements hub by keeping it problem-specific.
  • This is SEO content, trust clarification and internal-linking work only; create, upload, checkout, payment, download, Modal and photo-processing logic are unchanged.

Next step by user situation

The strengthened page now gives Google and users a clearer route from the query to the relevant action.

  • If the user already has a source photo, send them to the free checker first.
  • If the source photo has a clear defect, send them to retake or rejection-specific guidance.
  • If the user is comparing providers, send them to local, booth, cost or provider-checklist pages.
  • If the user is ready to prepare a UK passport photo online, send them to the main service route.

Route this user to the safest next action

The page now gives Google and users a clearer relationship between research intent, checker intent, and paid output intent.

  • Use requirements and rejection pages when the user is still diagnosing the photo.
  • Use the checker when the user has a source image and wants a preview before paying.
  • Use digital, code, or print pages only after the output route is clear.
  • Use trust and photo-handling pages when the user needs confidence before uploading.

What this page should prove

This added section helps search engines and users understand why the page exists and what the next safe action should be.

  • Trust pages should prove service scope, support route, privacy, refund/remake and independent-service boundaries.
  • Rejection pages should prove the visible problem, whether retake is safer, and which checker or guide page should be used next.
  • No page should imply official affiliation, guaranteed acceptance, fake reviews or control over official application decisions.

Fix, retake or check

This decision block helps users avoid paying again for a source photo that is unlikely to work.

  • Retake when the source photo has unclear face detail, blocked eyes, severe shadows, blur or missing head space.
  • Use a checker when the source photo looks mostly usable but the crop, background or output route is uncertain.
  • Choose digital file, photo code or print-ready output only after the visual problem is understood.

Head-size rejection patterns

This page should connect rejection language to the practical crop and source-photo decision.

  • The head may be too close to the top edge.
  • The face may appear too large or too small inside the output.
  • The chin or shoulders may be cut off.
  • The source photo may not have enough background to recrop safely.

What to do before paying again

This supports users who already experienced rejection and need a better replacement process.

  • Check whether the full head and shoulders are visible in the source image.
  • Use the crop checker if position is the issue.
  • Use the head-size checker if scale is the issue.
  • Retake from slightly further back if the source image is too tight.

Head-size rejection is usually a crop or distance issue

If the head appears too large or too small, first decide whether the source image has enough room to reframe safely.

  • If the head is cut off or too close in the source image, retake from farther back.
  • If the source has enough space, use a crop/check route to rebalance crown, chin and centre position.
  • Do not stretch the image to force a head-size match.
  • Avoid printing with fit-to-page scaling that changes the final size.

Check head size together with centring

A technically correct head size can still look wrong if the face is too high, too low or shifted sideways.

  • Check the vertical centre between crown and chin.
  • Check that the face is not shifted left or right.
  • Check that hair and chin are not touching the frame edge.
  • Use the size and crop guides together before trying again.

Useful next routes

Passport photo searches often mix requirements, checker, digital upload, code, and privacy questions. These related routes help you choose the right next step without relying on a government affiliation claim.

Related pages

FAQ

Can a rejected head size be fixed?

Sometimes, if the source photo has enough room around the head and shoulders. If the head is already cut off, retake first.

Why was my passport photo rejected for head size?

The head may appear too large, too small, too high, too low, or off-centre in the final photo.

Can head size be fixed without retaking?

Sometimes, if the source image includes the full head and shoulders with enough background space.

What if hair or chin is cut off?

Retake the photo. Missing head areas cannot be safely restored by cropping.

Can a rejected head-size photo always be recropped?

Only if the source image has enough space and detail. If the head is cut off or the image is too close, retake it.

How do I retake for better head size?

Step back slightly, include shoulders and keep the camera level with the face.

Can a tight selfie be fixed?

Only if enough head and shoulder space remains. If the head is cut off, retake it.

Should I use the crop checker first?

Yes. It can help identify whether reframing is possible before final output.

Can head size be fixed without retaking the photo?

Sometimes, if the source image has enough space around the head and shoulders. If the head is cut off, a retake is safer.

Why does head size cause passport photo rejection?

The face and head need to sit in the expected area of the photo. Too much or too little head area can make the image unsuitable.

Can head size be fixed if the original photo is too tightly cropped?

Sometimes, but if the original image cuts off hair, shoulders or surrounding space, retaking is usually safer.

Can a rejected head-size passport photo be fixed?

Sometimes, if the original image has enough surrounding space. If hair, shoulders or head space are cut off, retaking is safer.

Can head-size rejection be fixed with crop?

Sometimes, if the source image has enough room around the head and shoulders. If the source is cut off, retake first.

How should I retake after head-size rejection?

Stand slightly further back, keep the camera level and include the full head and shoulders with plain background around them.

Can I fix a passport photo rejected for head size?

Sometimes, if the source image has enough space around the head and shoulders. Retake if the head is already cropped too tightly.

Is head size the same as passport photo size?

No. Photo size is the final image or print dimension. Head size is how much of that frame is occupied by the head.

Ready to start

Prepare your photo before you submit it

Use the upload flow when you already have a source image, or keep exploring the guides if you still need to fix the setup first.